Aren't these cookies hilarious! I recently made 2 dozen of these for a bake sale that was put on by my nephew's baseball team. A little premade cookie dough, some frosting and m&m's turned these cookies into a monstrous hit! I found out later our best customers were the kids on the team...too funny!
Tuesday, October 26, 2010
Sunday, August 8, 2010
Morri's First Year - Premade Scrapbook
I created this simple yet meaningful book for a client who was attending a birthday party and wanted to honor the 1st year of this little peanut's life, isn't she adorable! It's amazing all the "firsts" babies go through as you'll notice on all the pages.
The client requested I use bright, vibrant colors similiar to those featured on her birthday invitation. I matched the DCWV designer papers with some sassy sayings from Karen Foster Designs, added dimension to each page with pop ups and a little more style by attaching real buttons and fibers to the cover. The finished piece is very cheery, uplifting and colorful, it's sure to brings a smile to anyone's face.
I have to admit, the one thing I truly loved about this project is the color palette my client chose for this little 1 year old. Baby books don't always have to be Pink and Blue. Hope you enjoy!
Tuesday, May 4, 2010
Cleaning Up
Well, I was cleaning up my pictures on picassa and inadvertantly eliminated some from my blog...all older posts, but none the less right now they are gone...grrr. I promise to repost in a bit - right now I have to replace my blow dryer...another grrrrr. Hope you have a great day! Kelly
Custom Order for a special friend
This past weekend I created 4 Scrapbooks for a good friend Mary Beth so she could give these as gifts to her Godchildren and family. How sweet is that! I had such a great time putting them all together and it was especially fun to customize these books for each child based on their interests. Mary Beth, thanks for thinking of me - I hope they LOVE their new books!
RECIPE FOR SWEET JULIE
Paper - K& Co Berry Sweet , DCWV colored cardstock, white cardstock
Embellishments - Berry Sweet Paper Stickers, Felt Flower Stickers & Chipboard, grosgrain ribbon, hemp thread, sheer ribbon, 7 Gypsies bound Chipboard, Creative Imagination Alphabet Stickers
RECIPE - DISNEY CARS FOR LOGAN
Paper - Glitz Design Hey Dude Patterned Paper, DCWV Cardstock, White Cardstock, EK Success Patterened Paper
Embellishments - EK Success Disney Cars Stickers, Creative Imagination Alphabet Stickers, Sheer ribbon
RECIPE - OUR FAMILY
Paper - Basicgrey Mellow Patterned Paper, white cardstock
Embellishments - DCWV colored chipboard, zutter coil, The Paper Studio stickers, button, hemp thread
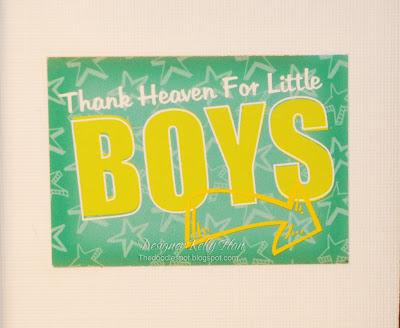
RECIPE - THANK HEAVEN FOR LITTLE BOYS
Paper - My Minds Eye Twinkle Twinkle Little Boy, DCWV colored cardstock, white cardstock
Embellihments - Daisy D's Rub-ons, EK Success stickers, Meandmybigideas cardstock stickers, The Paper Studio stickers, Karen Foster Stickers, sheer ribbon, pop dots, Creative Cafe Rub-ons, 8x8 brown scrapbook not pictured
Labels:
All Boy,
All Girl,
Baby Boy,
family,
K and Company,
premade scrapbooks,
Scrapbooking
Friday, April 23, 2010
FUN PHRASE FRIDAY - 3-dimensional Flower Card with instructions
Welcome to another week of FUN PHRASE FRIDAY! Today I chose to feature a card using the "Best Yet" stamp set from Stampin' Up! along with a do it yourself 3-dimensional rose. Want to learn more about this cool flower...read on =)
Instructions for 3-dimensional Flower
STEP 1: Grab any large flower punch or even scallop circle punch and double sided pattern paper.
STEP 2: Punch 8 flowers from the same punch
STEP 3: Crumple all 8 punched out flowers into tiny pieces
STEP 4: Unwrap all 8 punched out flowers
STEP 5: Stack your flowers on top of each other, alternating the front and back sides of the paper. Pierce a hole in the center of all your flowers with a paper piercing tool.
STEP 6: Insert a brad in the hole and fold the brad prongs on the backside of your flower stack - although this is a thick stack, there is enough room to secure it.
STEP 7: Begin folding each flower towards the center of the brad as tight as you can
STEP 8: Keep folding all those petals in towards the center. You're almost done, it's looking amazing isn't it!
STEP 9: Once you've folded all the petals into the center, start unfolding some petals starting from the bottom of your stack of petals...it will really look nice. Try different types of patterened papers - I think the patterened papers tend to look the best and give a very dramatic appeal!
Paper: K&Company Cut N paste Designer, Kraft Cardstock
Stamps Best Yet, Stampin' Up!
Ink: Chocolate Chip, Stampin' Up!
Accessories: EK Success Flower Punch, Stampin' Up! Scallop edge punch, Cricut Expressions & Storybook for leaves and stem, paper piercer, brad
Subscribe to:
Comments (Atom)


