Tuesday, January 26, 2010

Swap-Bot - Big Fat Stuffed Envelope Swap


Last week, while mindlessly surfing the web,  I found this very cool website called
swap-bot- it's an online website that allows you to set up and participate in swaps with other people around the world.  You get a log-in, fill out your profile which is just basic information about yourself to help your swapping partners know you better and then you can sign up for various swaps.  I have signed up for 3 swaps so far, "Big Fat Stuffed Envelopes", "February Love Matchbox Swap" and "Promote your Business Swap".

I just got done sending my first swap out (photo above).   I filled a large envelope with patterned paper by American Crafts, a handmade yellow chipboard scrapbook, ribbons, brads, eyelets, clips, buttons, plastic alphabet, a vintage magnet, valentines day candy, yellow spool of wire, 1 pack of rock & roll stickers and 1 pack of rub-ons.  I also included a sunflower charm which was on her list of her favorites.   I'm happy these goodies are going to a good home.

Monday, January 25, 2010

Photo Album Kit


I'm pleased to announce my first Photo Album kit for sale on Etsy.  These kits will go ons sale tomorrow.   I only have 8 kits, so if you are intersted, Click Now.  It's been quite a while since I've made a photo wallet so today I grabbed this gorgeous K&Company paper pack (Carolyn Gavin - Greenhouse) that has been taking up space in my closet and quickly got to work.  The colors make me so very happy!  I love the earthy olives, browns mixed with the bright pinks, oranges and blues.  In these winter months, this brings a lot of sunshine into my heart.  These photo albums would make a perfect keepsake for yourself or a wonderful gift for someone you love. 

Belly Band

Photo Album without Belly Band


Inside Photo Album (no pictures)


Inside Photo Album (with pictures)

Flaps open wide - look at all the photo opps (I only used 2)

Thanks for looking.

Saturday, January 23, 2010

"Wonderful You" Pop Up Book

Finished...finally.  I got this done last night and meant to post, but I was so tired I fell asleep on the couch and well....here I am this morning posting *smile*.  I absolutely LOVE this project!  Love, L-O-V-E, love it! 

Cover- "Stinkie the Skunk" welcomes you!


Inside 1 - "What a Hoot"


Inside 2 - "A little Love"


Inside 3 - "Sweet Beaver, my friend"


Inside 4 - "Owl Garden"


Top View


Close Up of my friend "Owl"

Inspired by Lilibee, I designed my pop up book to be a stand alone centerpiece. Each side features it's own theme, this way you can select pictures accordingly, whether they are taken from the same event or not.  What a great way to honor someone in your family, a friend, or use as a gift for someone else to cherish!  Speaking of a gift, this special pop up book is going to be wrapped up in love and sent to my very good friend Karen in WA.  I met Karen when I was pregnant with my second son and she was the original inspiration that helped me get in touch with my own creativity!  We've been friends for just under 6 years now and even though I don't live in WA anymore, our friendship has not changed!  Love ya girl!  Thanks for looking, I hope you like this!
Materials Used:  Cosmo Crickets Ever After Patterned Paper, DCWV The Green Stack Chipboard , Zig Writer for outlines, Pop Dots, Cosmo Cricket Rub-ons, Rhinestones, Assorted Stampin' Up! Punches for flowers, EK Success Tag Punch

Friday, January 22, 2010

Valentine Scrapbooks now on Etsy

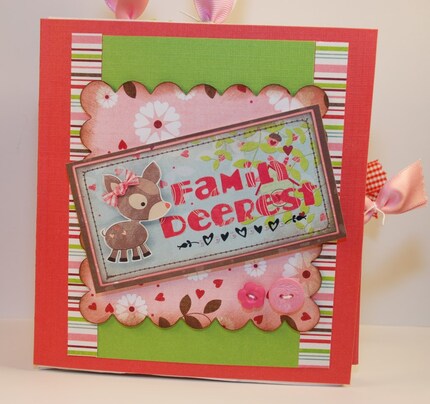
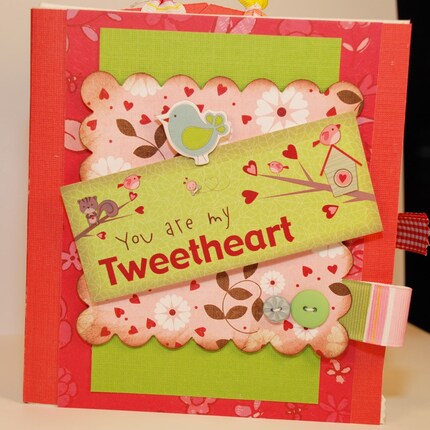
Yesterday I went to the craft store to purchase some stickers and paper for my boys Valentine boxes and I came across the most adorable Bo Bunny "Love Bandit/LoveUDeerly" collection!  I had to have it!  I bought some papers, stickers and cardstock sheets and quickly assembled these 2 albums.  The whimsical little forest friends are so adorable!  They have little raccoons, squirrels, birds, deer and even bugs and the sentiments are so sweet.  I've added some stitching on many of the inside pages, popped up stickers and other elements for a 3 dimensional feel.  There are 16 pages to add your favorite photos, journaling and other memorabilia. These are both for sale on my Etsy site where you can view all the interior pages and pullout tags.  Enjoy!


Thursday, January 21, 2010

The Best Chocolate Chip Cookies


I have fond memories as a young girl helping my mom in the kitchen.  I especially loved baking, something I'm proud to say, has been passed on to my two boys who love helping me in the kitchen!  
   
My family raves about this chocolate chip cookie recipe, the cookies are crispy on the outside, yet soft and chewy on the inside.  They have a rich nutty flavor which is the secret to this yummy goodness!  I hope you enjoy this recipe as we do.  Please read all the instructions before you start...also, I have high altitude notes at the end for my CO friends.

Perfect Chocolate Chip Cookies, from Cooks Illustrated

1 3/4 cups (8 3/4 ounces) unbleached all purpose flour
1/2 teaspoon baking soda
14 tablespoons (1 3/4 sticks) unsalted butter (*don't use a non-stick skillet to brown the butter.)
1/2 cup (3 1/2 ounces) granulated sugar
3/4 cup (5 1/4 ounces) packed dark brown sugar
1 teaspoon sea salt (or table salt)
2 teaspoons vanilla extract
1 large egg
1 large egg yolk
1 1/4 cups semisweet chocolate chips or chunks (guittard or ghiradelli preferred)
3/4 cup chopped pecans or walnuts, toasted (optional)

1. Adjust oven rack to middle position and heat to 375 degrees. Line baking sheets with parchment paper. Whisk flour and baking soda together in medium bowl; set aside.

2. Heat 10 tablespoons butter in 10-inch skillet over medium high heat until melted, about 2 minutes. continue cooking, swirling pan constantly until butter is dark golden brown and has a nutty aroma, 1-3 minutes. Remove skilled from heat and, using heatproof spatula, transfer browned butter to large heatproof bowl. Stir remaining 4 tablespoons butter into hot butter and until completely melted.

3. Add both sugars, salt, and vanilla to bowl with butter and whisk until fully incorporated Add egg and yolk and whisk until mixture is smooth with no sugar lumps remaining, about 30 seconds. Let mixture stand 3 minutes, then whisk for 30 seconds. Repeat process of resting and whisking 2 more times until mixture is thick, smooth, and shiny. Using rubber spatula or wooden spoon, stir in flour mixture until just combined, about 1 minute. Stir in chocolate chips.

4. Scoop dough (about 3tbsp) onto cookie sheet 2 inches apart. Bake cookies until they are golden brown and still puffy, and edges have begun to set but centers are still soft, 10-14 minutes. Transfer baking sheet to wire rack.

***High Altitude Notes: add 1 tablespoon flour, increase baking soda to 1 tsp, reduce granulated sugar by 1 tsp.

Wonderful You - Coming Soon!

This is the official sneak peak on my upcoming project titled "Wonderful You".  My goal is to have this completely finished by Friday.  I can not wait to get this done!  I actually had to put this on hold since I have been a very busy mom this week.  (and not to mention, I ran out of adhesive which thankfully came in today...wahoo!)

Wednesday, January 20, 2010

Valentines Day Accordian Album


Oh Valentines Day, time to remember those we love.  I don't know if we really should have a special day...I mean honestly, shouldn't every day be special?  Well, this time of year brings back happy memories and a little tradition my husband and I started when we first met.  For Valentines Day, we didn't buy any cards, or gifts, and we didn't go out to eat.  Instead, we had our very own homemade tradition right at home.  This has been so much fun over the years!  We always make dinner together, we make our own cards and some years our own gifts.  Ok, maybe a little unfair for my husband, but really it's been a great time to reconnect and put our hearts in the right place.   This year, we're going to have the boys help us decide what's for dinner and have them help us make it.  They love to cook so this will be easy.  Speaking of cooking...I promise to post the best chocolate chip cookie recipe I've found.  It's so yummy!

Sweet Valentine

I have been doing a little housekeeping and took down last years calendar and thought this layout was so fitting to share for Valentines Day. 


**Update - I just uploaded a better picture**  I have to confess, the picture quality is very poor in this photo since it appears to take on a yellow sheen...it is rather pink and rose in real life.  You see, the other day I accidentally pushed my Nikon off the table which was fitted with my husbands flash.  Both camera and flash survived, however the part on my camera that holds the external flash ripped off and stayed attached to the flash.  (yes, I had to confess this incident to my hubby and do you know what he did...he offered me his camera.  I love that man!)

Monday, January 18, 2010

Sweet Treats Giveaway!


Be sure to head on over to The Clack House Handmade Candles & Tarts blog for your chance to enter to win 6 of these super sweet Pink Sugar Cupcake Wax Tart Melts!

Sunday, January 17, 2010

OLD GUYS RULE!

Last night, my husband and I decided to get really crazy...we stayed up really late...yes, past 10pm (grin), I know...sad.

While he was on his computer, I sat comfortably in my craft room looking at an old calendar I had scrapbooked when I spotted a picture of dad on a Harley.  No he doesn't actually have a Harley, honestly, I'm not even sure if he knows how to ride one, but it was a pretty fantastic picture!


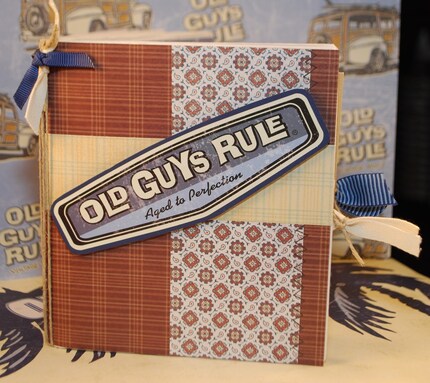
Thinking of that picture inspired me to create a book dedicated to "Old Guys" in our lives.  Don't get me wrong, my dad isn't old, just refined (your welcome dad).   Anyhow, this scrapbook is hilarious!  I'm putting 2 of these out on my etsy site for sale if you are interested.  The captions inside are great!   I think my favorite is "The Older I get, The Better I Was".

Friday, January 15, 2010

Froggy Love Valentine - Mini Mailbox

This is a sneak peak of what I'm shipping out for an ETSY customer tomorrow.   I can't get enough of this cute little froggy! It's hard to tell in this picture, but there is a lot of glitter on the froggy itself, as well as on the inside sentiments (not pictured).  This little mailbox contains some yummy candies and a tiny note card.  I hope the girls who are receiving this will LOVE it!


New Mini Mailboxes - Lauren gets first pick


Here is a quick glimpse at the last of my mini mailboxes that I will be posting on Etsy today.  These miniature sized mailboxes are the perfect gift for that special someone!  Not only can you add your own  note, you can also add candies, toys, money (ha ha) or practically anything that might just fit inside.  If your interested in purchasing one of your own, please visit my new Etsy site.

Lauren - let me know which mailbox you would like for the girls and I'll get it shipped out today =)

Happy Valentines Day!
Kelly

Friday, January 8, 2010

Accordian Album Gone Crazy


Glitz Pack, paper pack and my "Family" Album

I was web-surfing one day and saw this really cool accordion album on someone's blog (I'm sorry I can't give this person credit...what a cool idea they had!).  I decided I had to make an album similar to the one I'd seen.  I pulled out this very cool "Hey Dude" total boy, paper pack and created a "Family" album as you'll see in my next few posts.  I had so much fun making this album.  I have the pictures in the order that the album is opened...some pages flip up, others flip right and left.   I also put pictures on the backside of the album to maximize the amount of space I had to place my pictures.  I've decided, although there was some serious "cool factor" in this album with  all it's interactive parts, I decided that next time I will only have the album flip open left and right (not up and down)...easier for others to enjoy and it will sit nicely wide open on your desktop, counter or wherever you decided to place this.    


My New "Blog Banner" and things to come

Woo Hoo!  I've been wanting a Blog Banner since, well, since I started this Blog!  I won't say how many attempts I made at creating my own banner, but I'm certainly happy I finally finished one I liked.  I decided to just add some pictures of items I've created, add my title and call it good....so I'm happy to unveil the new banner, hope you like it (grin).

So for the last 2 days I have been working non-stop in my craft room photographing, cataloging and listing some of the items I've recently made, and preparing them for their first debut in my online store!  Yes, I'm so jazzed to announce I've joined the online group of sellers and will soon have a store of my own!  I'm not giving any details quite yet, so be patient.  Dad has to help me with shipping/handling for my items and then I should be ready to go - hopefully by tomorrow (fingers crossed).